However, now that Township and Range is available on Google Earth, the process only takes a few minutes.
You can see the result below, or download the corresponding kmz file.
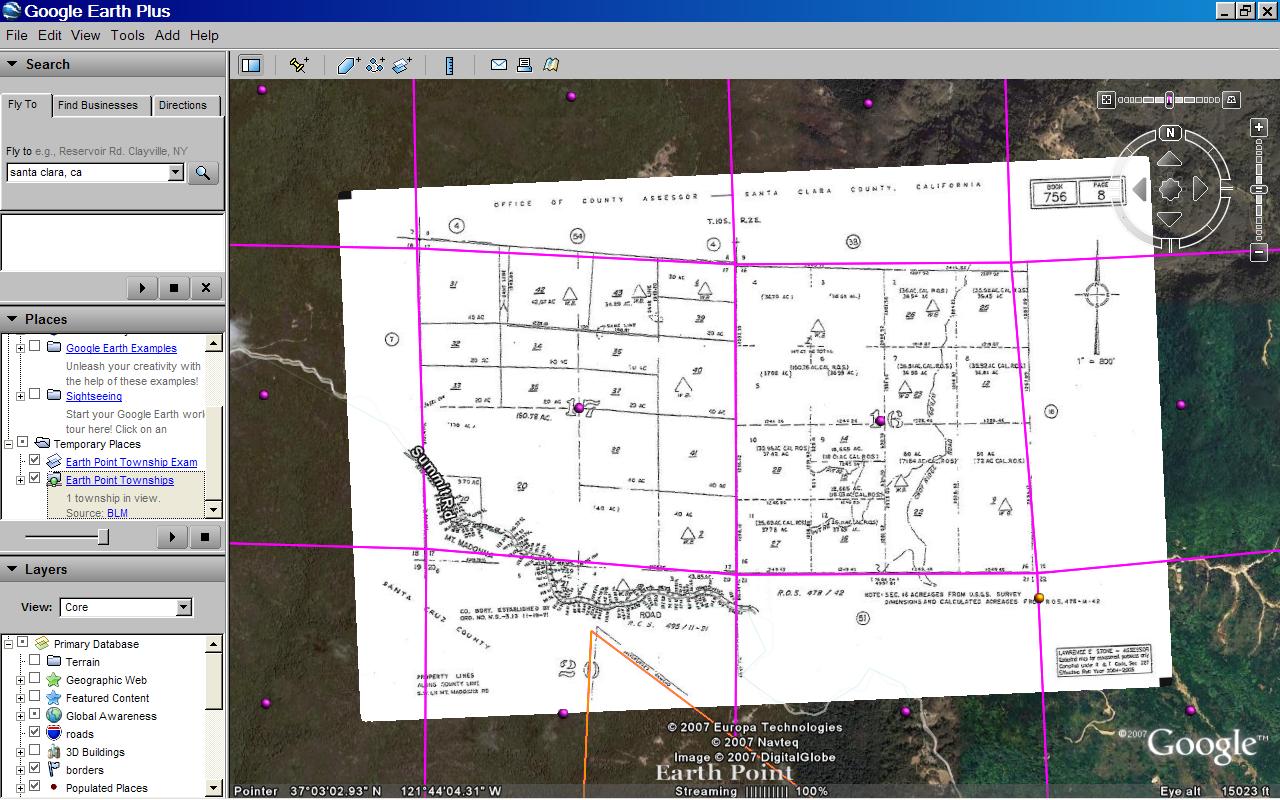
Plat map overlaid on Google Earth. Shown with BLM section lines. Click for larger image.
Thanks to Nick Wold of Orbit Investments for suggesting that BLM townships be mapped onto Google Earth.
How to position a plat map onto Google Earth.
If the map is of an area that has BLM coverage and if you have a rough idea about its location, then you could possibly take this shortcut.
- Zoom into the area on Google Earth.
- Go to the Earth Point Township & Range page.
- Under "BLM Townships, Ranges, and Sections" click the "View on Google Earth" button.
- Once the Townships and Sections appear on Google Earth, mouse-over the purple icons and find the section you are looking for.
- Then go directly to the Put the map onto Google Earth section below.
Otherwise, start at the beginning...
We need to know which state and which prime meridian the map is part of.
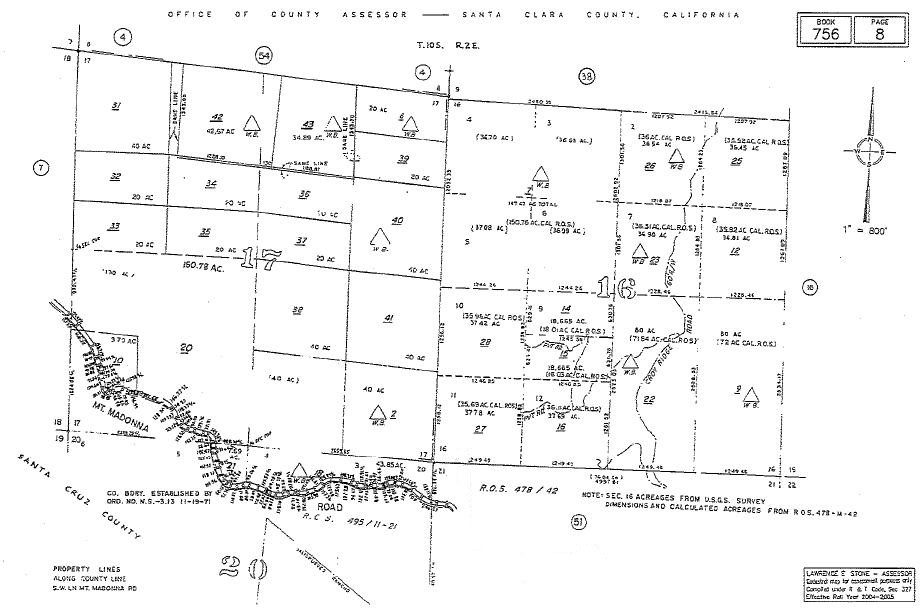
Plat map. Click for larger image.
- Click on the plat map above to see it full size. At the top of the image we see that it is part of T10S R2E (Township 10 South, Range 2 East) in Santa Clara County, California. The map itself covers sections 16 and 17.
- California has three principal meridians. The next few steps show one way to figure out which one to use.
- Go to the Google Earth "Fly To" box and type in "Santa Clara, California". The city of Santa Clara is located in Santa Clara County, so now we are in the neighborhood.
- Go to Earth Point's Township & Range page.
- In the "National Atlas" section, click the "View On Google Earth" button. "National Atlas" is used because it has the best coverage.
- The Google Earth screen fills with township outlines.
- Mouse-over the yellow icons. You will see that these townships originate from the "Mount Diablo" principal meridian.
 "National Atlas" townships. Centered on T10S R2E, Santa Clara County. Click for larger image.
 - At this point, you could look for T10S R2E, but this is harder than it seems. Much of California's land survey is based on original land grants and is not laid out in a nice grid. Therefore, we will use Earth Point's "Fly To" button to locate the township.
- To keep the Google Earth screen from becoming too cluttered, let's delete the townships we already have. In the Google Earth "My Places" section, right click on "Earth Point Townships ... National Atlas". On the pop-up menu, click "Delete".
- Go to the Township & Range page. In the drop-down boxes, select "California", "Mount Diablo", "10S", and "2E".
- Click the "Fly To On Google Earth" button.
- T10S R2E is displayed on the Google Earth screen.
- To position the plat map, we also need section lines.
- Go to the Township & Range page.
- Under "BLM Townships, Ranges, and Sections", click the "View On Google Earth" button.
- The BLM townships are displayed on Google Earth. If you zoom in close enough, the sections are also displayed.
- Mouse-over the purple dots to find sections 16 and 17. We could stop here, but let's place the map onto Google Earth.
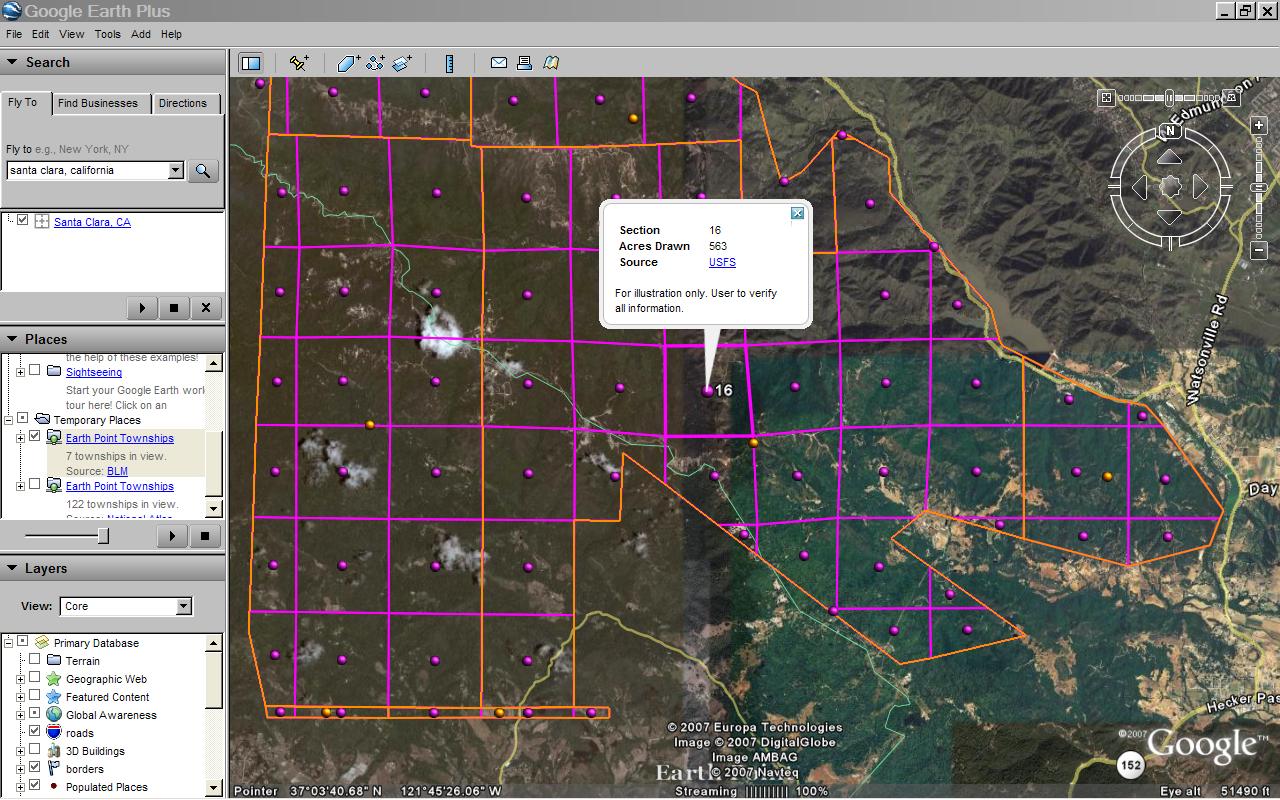 "BLM" townships, T10S R2E Section 16. Click for larger image.
- Normally, we get plat maps from a county assessor's office, title company, or the like.
- For this example, we can use the map above.
- Scroll up to the picture captioned Plat map. Click for larger image. Right-click the map. Click "Save As" on the pop-up menu.
- We are going to make an image overlay. The Google Earth User Guide has more information about image overlays.
- On the Google Earth menu at the top of the screen, click "Add" then "Image Overlay".
- On the window that pops-up, click the "Browse" button and get the plat map you saved.
- Shrink, stretch, and rotate the plat map to fit BLM sections 16 and 17 as best you can. It will not be perfect.
- Adjust the transparency so that you can see both the dark lines on the plat map and features on the underlying Google Earth imagery.
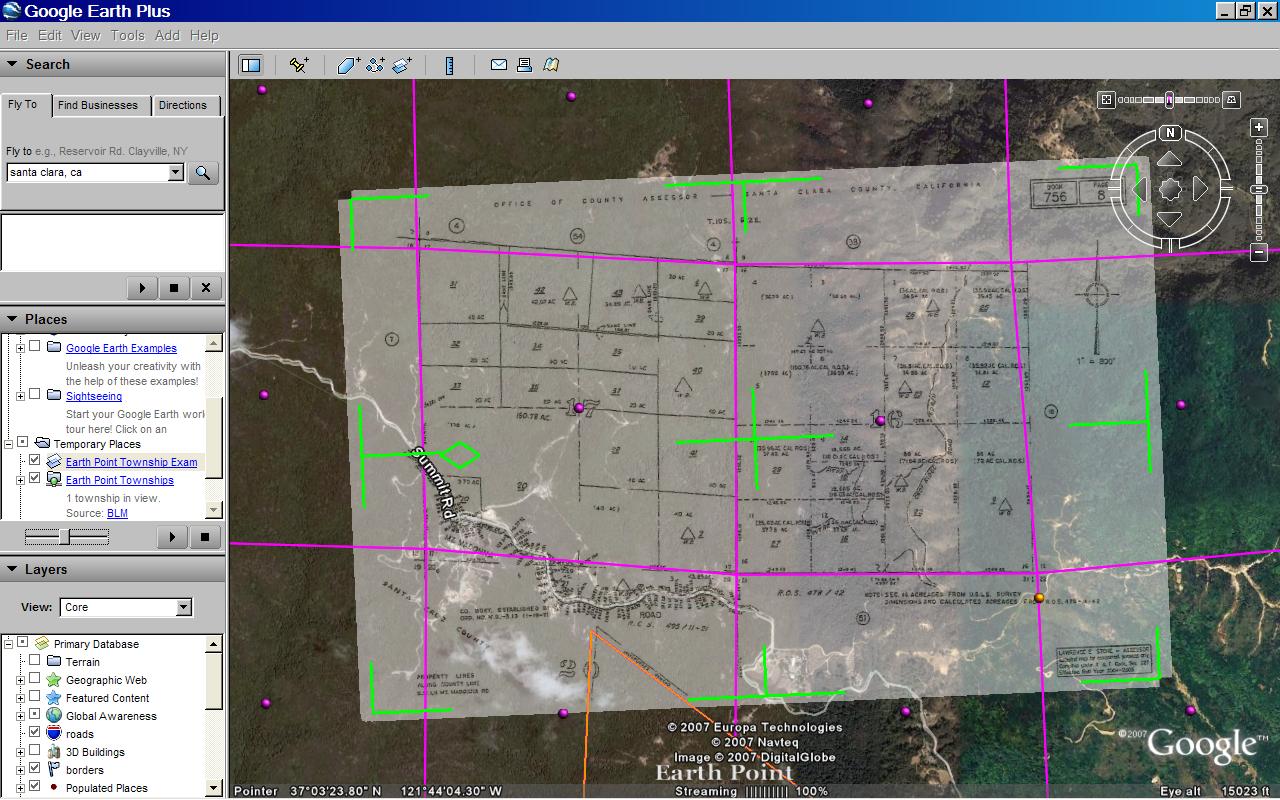 Plat map aligned with Google Earth. Transparency is set to show the underlying satellite imagery. Transparency will be removed before the image overlay is saved. Click for larger image.
 - Shrink, stretch, and rotate the plat map again, this time to fit the Google Earth imagery.
- Remove the transparency.
- Add a comment or two and save the image overlay.
- That's it!